What we need:
You must have following software installed in your system:
- WebSphere MQ 6
- BEA Weblogic 10
- JDK 1.5 or above. (This comes bundled with Weblogic)
What we going to do:
- Create a queue manager and two local queues namely MQSenderQueue and MQReceiverQueue in Websphere MQ, one for sending a message to our MDB at Weblogic and other one for receiving messages from Weblogic. Create and configure JMS Foreign Server, Destinations and Connection Factories.
- Code and deploy a MDB in Weblogic and automatically receive messages from MQ MQSenderQueue and place it at a second MQ queue MQReceiverQueue using Weblogic Foreign JSM Server features.
For testing:
Creating queue managers, queues and connection factories in WebSphere MQ:- Put a test message to MQSenderQueue at MQ.
- Monitor Weblogic console to see if it has received and sent the message again to MQ.
- See the message received at the MQReceiverQueue at MQ.
Creating queue manage
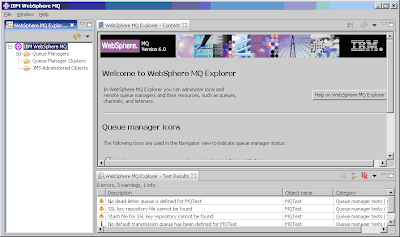
Image #1: WebSphere MQ Explorer
Click on Start -> Program Files -> IBM WebSphere MQ -> WebSphere MQ Explorer to open WebSphere MQ Explorer. Optionally execute C:\Program Files\ibm\WebSphere MQ\bin strmqcfg.exe to run explorer.

Image #1: WebSphere MQ Explorer
On the left hand side WebSphere MQ Explorer – Navigator pane, click on 'IBM WebSphere MQ' node to expand that, if it is not expanded already.

Image #2: Create queue manager in MQ

Image #3: Create queue manager in MQ

Image #4: View queue manager in MQ
- To create a queue manager, right click on the ‘Queue Managers’ node and select New -> Queue Manager.
- In the opened window, enter name “MQTest” in the name textbox and keep clicking Next-> and finally click Finish.

Image #2: Create queue manager in MQ

Image #3: Create queue manager in MQ

Image #4: View queue manager in MQ
Creating WebSphere MQ local queues
Creating JNDI Context and Connection factories
Now let us create MQ queues. As I mentioned above, we are going to create two queues. We will be using one of them to put a test message which is to be received by our MDB at BEA Weblogic and the other one is used by our MDB to put message the message back into second MQ queue, so that we can see the same message again in MQ, but in the second MQ queue.
We are going to create two local queues using MQ explorer.
1. To create our first local MQ queue, right click on Queues node under “MQTest” queue manager. Select New -> Local Queue.


3. Repeat the above two steps to create another local queue “MQReceiverQueue”. Note the naming I followed here – used a prefix MQ to avoid the confusions since we use similar JNDI names in Weblogic also.
Optionally, you may create MQ queue manager and local queues using command prompt. Open a command prompt (CMD) and CD to C:\Program Files\ibm\WebSphere MQ\bin.
We are going to create two local queues using MQ explorer.
1. To create our first local MQ queue, right click on Queues node under “MQTest” queue manager. Select New -> Local Queue.

Image #5: Create local queue in MQ
2. Enter name for our first local MQ queue “MQSenderQueue” as shown below. Click “Next” and finally “Finish”. This is the queue we will be using to put our test message.
Image #6: Create local queue in MQ
3. Repeat the above two steps to create another local queue “MQReceiverQueue”. Note the naming I followed here – used a prefix MQ to avoid the confusions since we use similar JNDI names in Weblogic also.
Optionally, you may create MQ queue manager and local queues using command prompt. Open a command prompt (CMD) and CD to C:\Program Files\ibm\WebSphere MQ\bin.
- Create the queue manager: crtmqm MQTest.
- Start the queue manager: strmqm MQTest.
- Create queues in the queue manager:
runmqsc MQTestPlease note that I haven’t tried this option, so I am not sure how it works.
DEFINE QLOCAL(MQSenderQueue)
DEFINE QLOCAL(MQReceiverQueue)
end
Creating JNDI Context and Connection factories
Next, create a simple file-based JNDI context and configure the JMS objects in that JNDI namespace. These JNDI objects are used by applications running in WebSphere Application Server Community Edition to connect to the WebSphere MQ queue manager. For this exercise, WebLogic and WebSphere MQ should be on the same machine.
The setting is for file-based JNDI. Create the directory C:\MQ-JNDI before continuing with the next step. Under new folder C:\MQ-JNDI, create a file mq-jndi.properties with the following contents:
INITIAL_CONTEXT_FACTORY=com.sun.jndi.fscontext.RefFSContextFactory
PROVIDER_URL=file:/C:/MQ-JNDI
SECURITY_AUTHENTICATION=none
Next open a command prompt, cd to C:\MQ-JNDI, create the QueueConnectionFactory and Queue objects by executing the command:
“C:\Program Files\IBM\WebSphere MQ\Java\bin\JMSAdmin.bat” -cfg mq-jndi.properties
You should see this prompt, where you can configure the JNDI objects:
InitCtx>
At the prompt, copy and paste all five lines of following commands together and press Enter.
You should see a message like “Stopping Websphere MQ classes for Java(tm) Message Service Administration” after you press Enter after the last line “end”.
With that, we now have MQ queues ready (see following image). Next task is to create a MDB in EJB 3 and deploy it in BEA Weblogic 10.
The setting is for file-based JNDI. Create the directory C:\MQ-JNDI before continuing with the next step. Under new folder C:\MQ-JNDI, create a file mq-jndi.properties with the following contents:
INITIAL_CONTEXT_FACTORY=com.sun.jndi.fscontext.RefFSContextFactory
PROVIDER_URL=file:/C:/MQ-JNDI
SECURITY_AUTHENTICATION=none
Next open a command prompt, cd to C:\MQ-JNDI, create the QueueConnectionFactory and Queue objects by executing the command:
“C:\Program Files\IBM\WebSphere MQ\Java\bin\JMSAdmin.bat” -cfg mq-jndi.properties
You should see this prompt, where you can configure the JNDI objects:
InitCtx>
At the prompt, copy and paste all five lines of following commands together and press Enter.
def xaqcf(MQSenderQCF) qmgr(MQTest)
def xaqcf(MQReceiverQCF) qmgr(MQTest)
def q(MQSenderQueue) qmgr(MQTest) queue(MQSenderQueue)
def q(MQReceiverQueue) qmgr(MQTest) queue(MQReceiverQueue)
end
def xaqcf(MQReceiverQCF) qmgr(MQTest)
def q(MQSenderQueue) qmgr(MQTest) queue(MQSenderQueue)
def q(MQReceiverQueue) qmgr(MQTest) queue(MQReceiverQueue)
end
You should see a message like “Stopping Websphere MQ classes for Java(tm) Message Service Administration” after you press Enter after the last line “end”.
With that, we now have MQ queues ready (see following image). Next task is to create a MDB in EJB 3 and deploy it in BEA Weblogic 10.

Image #7: MQ explorer showing queue manager and local queues.
Configuring Foreign JSM Server in BEA Weblogic Server:
Before starting your Weblogic Server you have to ensure that certain MQ related jar files are in your Weblogic Server’s classpath. Easiest way to do this is to copy following jars from “C:\Program Files\ibm\WebSphere MQ\Java\lib” folder to your Weblogic domain’s lib (C:\bea\user_projects\domains\RnD\lib in my case) folder, from where Weblogic loads them up while starting.
- com.ibm.mq.jar
- com.ibm.mqjms.jar
- commonservices.jar
- dhbcore.jar
- fscontext.jar
Once jars are in Weblogic Server’s class path, start your Weblogic server and login to Weblogic admin console. To start with, click ‘Lock & Edit’ button.
Expand Services -> Messaging on LHS menu and click JMS Modules link.
Click on “New” button on RHS

Type in a name “MQIntegrationTest” in the Name text box and press Next.


Expand Services -> Messaging on LHS menu and click JMS Modules link.
Click on “New” button on RHS

Image #8: Configuring JMS module
Type in a name “MQIntegrationTest” in the Name text box and press Next.

Image #9: Configuring JMS module
Select the Target server (in my case it was AdminServer) as shown below, press Next and finally Finish. Click on “Activate Changes” button on LHS.
Image #10: Creating JMS module
Create JMS Foreign Server
Creating MDB and deploying it.Click on Lock & Edit again.
Select Services -> Messaging -> JMS Modules as you did earlier, and click on newly created module “MQIntegrationTest”. Click New button.
Select “Foreign Server” radio button and click “Next”.


Click Lock & Edit again.
Open the newly created Foreign JMS server byt clicking Services -> Messaging -> JMS Modules -> MQIntegrationTest -> MQTestForeignServer.
Under the General tab under Configuration, type in following details:
JNDI Initial Context Factory: com.sun.jndi.fscontext.RefFSContextFactory
JNDI Connection URL: file:/C:/MQ-JNDI
Click “Save”.

Click on Destinations link in the Configuration tab at the top and click New

Name: ReceiverDetails
Local JNDI Name: jms/WLReceiverQueue
Remote JNDI Name: MQSenderQueue
Note that the Remote JNDI Name must match the name of the queue you created in WebSphere MQ broker.
Click OK.

Name: ReplyDetails
Local JNDI Name: jms/WLReplyQueue
Remote JNDI Name: MQReceiverQueue
Now you can see two Destinations created:

Let’s create two Connection Factories for above queues.
Click on Connection Factories (next to Destinations) and click New

Enter following details in “Create a New Foreign JMS Connection Factory” page.
Name: ReceiverCF
Local JNDI Name: jms/WLReceiverQCF
Remote JNDI Name: MQSenderQCF
Again, the remote JNDI name must match on you have given to MQ connection factory.
Click Ok.

Name: ReplyCF
Local JNDI Name: jms/WLReplyQCF
Remote JNDI Name: MQReceiverQCF
With that, you can see two Connection Factories created for our Foreign JMS Server like shown below:

Select Services -> Messaging -> JMS Modules as you did earlier, and click on newly created module “MQIntegrationTest”. Click New button.
Select “Foreign Server” radio button and click “Next”.

Image #11: Creating JMS foreign server
Enter “MQTestForeignServer” in the Name text box, click Next button. In this page you can see that the target server is selected already. Click Finish.
Image #12: Creating JMS foreign server

Image #13: Creating JMS foreign server
Activate changes by clicking “Activate Changes” button.Click Lock & Edit again.
Open the newly created Foreign JMS server byt clicking Services -> Messaging -> JMS Modules -> MQIntegrationTest -> MQTestForeignServer.
Under the General tab under Configuration, type in following details:
JNDI Initial Context Factory: com.sun.jndi.fscontext.RefFSContextFactory
JNDI Connection URL: file:/C:/MQ-JNDI
Click “Save”.

Image #14: Configure JMS foreign server
Creating DestinationsClick on Destinations link in the Configuration tab at the top and click New

Image #15: Create Destinations
Type in following:Name: ReceiverDetails
Local JNDI Name: jms/WLReceiverQueue
Remote JNDI Name: MQSenderQueue
Note that the Remote JNDI Name must match the name of the queue you created in WebSphere MQ broker.
Click OK.

Image #16: Configure Destination
Repeat the above to create another Destination with following details:Name: ReplyDetails
Local JNDI Name: jms/WLReplyQueue
Remote JNDI Name: MQReceiverQueue
Now you can see two Destinations created:

Image #17: Newly created Destinations
Creating DestinationsLet’s create two Connection Factories for above queues.
Click on Connection Factories (next to Destinations) and click New

Image #18: Create connection factories
Enter following details in “Create a New Foreign JMS Connection Factory” page.
Name: ReceiverCF
Local JNDI Name: jms/WLReceiverQCF
Remote JNDI Name: MQSenderQCF
Again, the remote JNDI name must match on you have given to MQ connection factory.
Click Ok.

Image #19: Create connection factory
Repeat the above steps to create one more connection factory for our ReplyQueue:Name: ReplyCF
Local JNDI Name: jms/WLReplyQCF
Remote JNDI Name: MQReceiverQCF
With that, you can see two Connection Factories created for our Foreign JMS Server like shown below:

Image #20: Connection factories
Click on “Activate Changes” to activate changes. With that you are done with creating and configuring Foreign JMS Server. The only thing pending before we test is to code and deploy our MDB.Here is the MDB code:
/*
* File: TestMDB.java
* Copyright (c) 2007-2008 ibswings.com. All rights reserved.
*/
package com.ibswings.ejb3.mdb;

import javax.annotation.PostConstruct;
import javax.annotation.PreDestroy;
import javax.annotation.Resource;
import javax.ejb.ActivationConfigProperty;
import javax.ejb.MessageDriven;
import javax.jms.JMSException;
import javax.jms.Message;
import javax.jms.MessageListener;
import javax.jms.QueueConnection;
import javax.jms.QueueSender;
import javax.jms.QueueSession;
import javax.jms.Session;
import javax.jms.TextMessage;

/**
* Class: TestMDB
*
* @author Ishwara Varnasi
* @date Feb 17, 2008
*/
@MessageDriven(name = "TestMDB", mappedName = "jms/WLReceiverQueue",
activationConfig = {@ActivationConfigProperty(
propertyName = "destinationType",
propertyValue = "javax.jms.Queue")}
)
public class TestMDB implements MessageListener {

public void onMessage(Message msg) {
System.out.println("\n=========================================");
System.out.println("=> Message received!");

if (msg instanceof TextMessage) {

try {
System.out.println("=> Message: "
+ ((TextMessage) msg).getText());
} catch (JMSException e) {
e.printStackTrace();
}
}

// Place the message on to the reply queue (WLReplyQueue)
putMessage(msg);
System.out.println("=========================================");
}

@Resource(name = "WLReplyQueue", mappedName = "jms/WLReplyQueue")
private javax.jms.Queue queue;
@Resource(name = "WLReplyQCF", mappedName = "jms/WLReplyQCF")
private javax.jms.QueueConnectionFactory tcf;

public void putMessage(javax.jms.Message msg) {
System.out.println("=> Placing message on WLReplyQueue...");
QueueConnection queueConnection = null;
QueueSession queueSession = null;
QueueSender queueSender = null;

try {
queueConnection = tcf.createQueueConnection();
queueSession = queueConnection.createQueueSession(false,
Session.AUTO_ACKNOWLEDGE);
queueSender = queueSession.createSender(queue);
queueSender.send(msg);
System.out.println("=> Message sent!");

} catch (Exception e) {
System.out.println("Exception: ");
e.printStackTrace();

if (e instanceof JMSException) {
((JMSException) e).getLinkedException().printStackTrace();
}

} finally {

try {
System.out.println("=> Closing Connection");
queueSession.close();
queueConnection.close();
} catch (Exception e) {
System.out.println("Exception: ");
e.printStackTrace();

if (e instanceof JMSException) {
((JMSException) e).getLinkedException().printStackTrace();
}
}
}
}

@PostConstruct
public void postCreate() {
System.out.println("Bean Created");
}

@PreDestroy
public void preDestroy() {
System.out.println("Bean Destroyed");
}
}
The above code is for a simple message driven bean. It receives messages from MQSenderQueue and onMessage() prints out the content of text message received. Next it places the message back to the WLReplyQue. Note that in the code we never directly place message on to MQ queue. We are actually placing the message to a MQ queue namely MQReceiverQueue using Foreign JMS Server and local Weblogic JNDI name WLReplyQue.
Since we are using EJB 3, we actually do not need an ejb-jar.xml since we are using annotaions. However, to make it work on Weblogic 10, we still need a weblogic-ejb-jar.xml. Somehow I couldn’t get it working without this. Also note that I am using an older (90) schema for weblogic-ejb-jar.xml. Following is the content of Weblogic-ejb-jar.xml:
Since we are using EJB 3, we actually do not need an ejb-jar.xml since we are using annotaions. However, to make it work on Weblogic 10, we still need a weblogic-ejb-jar.xml. Somehow I couldn’t get it working without this. Also note that I am using an older (90) schema for weblogic-ejb-jar.xml. Following is the content of Weblogic-ejb-jar.xml:
<weblogic-ejb-jar xmlns="http://www.bea.com/ns/weblogic/90"
j2ee="http://java.sun.com/xml/ns/j2ee"
xsi="http://www.w3.org/2001/XMLSchema-instance"
schemalocation="http://www.bea.com/ns/weblogic/90 http://www.bea.com/ns/weblogic/90/weblogic-ejb-jar.xsd">
<weblogic-enterprise-bean>
<ejb-name>TestMDB</ejb-name>
<message-driven-descriptor>
<destination-jndi-name>
jms/WLReceiverQueue
</destination-jndi-name>
<connection-factory-jndi-name>
jms/WLReceiverQCF
</connection-factory-jndi-name>
</message-driven-descriptor>
</weblogic-enterprise-bean>
</weblogic-ejb-jar>
Create EJB jar and deploy it in Weblogic Server. You need to restart Weblogic instance if you do any changes in MQ to reflect that in Weblogic. We are all set to test now!
Testing
Open WebSphere MQ explorer, click on MQTest (our queue manager) -> Queues. On the RHS table, right click on MQSenderQueue and select “Put test message” in the popup menu. Type in a test message, say, “Hello MQ-Weblogic World!”, click “Put Message” and close.

=========================================
=> Message received!
=> Message: Hello MQ-Weblogic World!
=> Placing message on WLReplyQueue...
=> Message sent!
=> Closing Connection
=========================================
Now go to MQ explorer and check messages in the second queue – MQReceiverQueue – you should be able to see this message.

This article is inspired by an article by Sanjay M Kesavan at
http://www-128.ibm.com/developerworks/websphere/library/techarticles/0604_kesavan/0604_kesavan.html
I would like thank Mr. Kesavan, author of above wonderful article.
That’s it. You may send your feedbacks to me on ivarnasi@gmail.com.

Image #21: Put a test message for testng.
Go to your Weblogic Servers’ output console and you will see the message. Outputs look like:=========================================
=> Message received!
=> Message: Hello MQ-Weblogic World!
=> Placing message on WLReplyQueue...
=> Message sent!
=> Closing Connection
=========================================
Now go to MQ explorer and check messages in the second queue – MQReceiverQueue – you should be able to see this message.

Image #22: Queues with messages.
This article is inspired by an article by Sanjay M Kesavan at
http://www-128.ibm.com/developerworks/websphere/library/techarticles/0604_kesavan/0604_kesavan.html
I would like thank Mr. Kesavan, author of above wonderful article.
That’s it. You may send your feedbacks to me on ivarnasi@gmail.com.


443 comments:
«Oldest ‹Older 401 – 443 of 443Appreciate the detailed write-up. I’ve been comparing different salesforce cpq course options, and resources like this really help in making the right decision.mulesoft training courses
very attractive
Best Data Science Course Training in Pune
Best Data Analytics Course Training in Pune
Thanks for sharing such detailed information about Salesforce CPQ training. It really helps professionals who are planning to build a career in CPQ.learn salesforce cpq
Great information shared here, and mule software training by OnlineITGuru is an excellent choice for skill development.mulesoft developer course
Nice explanation! Proper mule software training is really important for building strong integration skills. Appreciate the effort you put into making this easy to understand.mulesoft developer course
This is a great resource for professionals interested in Mule software training. The content is clear, practical, and easy to followmulesoft developer course
Nice insights shared here. Mule software training is becoming essential as more companies adopt API-driven architectures for digital tmulesoft developer course
ransformation.
Great article, a structured MuleSoft Developer Course can boost your career in enterprise integrationmulesoft developer course
Great insights about fencing solutions! Security and durability are very important when choosing the right fencing contractor. We recently explored similar services offered by VPS Fencing Contractor in Chennai, and their customized fencing options for residential and industrial projects are impressive. Thanks for sharing this informative post!
Great article! Certification is very important when working with integration platforms. Many professionals are now choosing Mulesoft certification training to validate their skills. With structured Mulesoft certification training, learners can prepare for industry-recognized MuleSoft exams and improve their job opportunities in the IT industry.mulesoft training
Great article! ServiceNow is becoming one of the most in-demand platforms in the IT service management industry. Your explanation makes it easy to understand why professionals should learn it. For those searching for professional servicenow admin training, OnlineITGuru provides comprehensive training with real-time scenarios and expert guidance, which is very useful for gaining practical experience in the platform.servicenow admin training
Career-oriented AI programs are very useful for students and professionals. I found this
AI Training and Placement in Electronic City Bangalore course with certification and placement support.
Thanks for sharing this article. I found a great program for
Best AI Training in Electronic City which offers real-time AI project experience.
Very well presented! This platform helps users understand things clearly. The recommendations make planning much more efficient. Top ten universities in world.
If you're looking to transition from a non-tech background, I suggest starting with this Data Science Training in Electronic City. They explain statistics and Python from the very basics.
Loved the way this is presented. The platform simplifies things that usually take a lot of time to understand cost of studying in UK for Indian students 2026 . It helps users stay focused on what actually matters.
Great perspective shared here. The platform makes decision-making feel less risky and more structured cost of studying in UK for Indian students 2026 . It supports users in every stage of their planning.
Great content! This platform makes learning about Advance AI Course in Coimbatore much more clear and organized.
Great thoughts you got there, believe I may possibly try just some of it throughout my daily life. AI Training in Coimbatore
Great explanation! This platform gives clear guidance for anyone searching for thetop 10 artificial intelligence colleges in Coimbatore fees.
Great post! I found the information really insightful Thanks for sharing.
AI / ML training institute
Helpful and easy to understand. The platform removes unnecessary confusion. It makes the journey more manageable. universities without IELTS in Germany
Great content! The platform makes the entire journey smooth and easy. The personalized suggestions really improve the overall experience. universities without IELTS in Germany
This is a brilliant step-by-step guide – I remember struggling with MQ and Weblogic integration back in the day. The Foreign JMS Server configuration you've outlined is still relevant for understanding messaging fundamentals. For those in Bangalore looking to apply similar integration concepts in modern cloud-native environments, I've found that DevOps training with real-time projects Electronic City Bangalore covers CI/CD pipelines, container orchestration, and message-driven architecture in today's tools. Your post is a fantastic archive of enterprise Java integration history. Thanks for preserving this!
This is a fantastic resource – the Linux linked list implementation is a perfect example of how to write reusable, type-safe macros in C. I particularly liked how you explained the list_for_each_entry macro, which saves so much boilerplate. For IT professionals in Electronic City who want to build on this systems knowledge and move into cloud-native engineering, checking DevOps course fees and duration Electronic City Bangalore is a great first step. Understanding kernel-level design patterns makes you a much better engineer when working with container runtimes. Keep up the great content!
Great content! The article does a good job of explaining the topic in a way that is easy to understand while keeping the reader interested throughout living expenses in UK for students per city
Great content! The platform makes the entire journey smooth and easy. The personalized suggestions really improve the overall experience. free education countries for indian students
Well explained! The platform makes everything feel simple and clear. It helps users take better decisions. universities in Germany
I highly recommend this Best Azure DevOps Institute near Electronic City Phase 2 for anyone who wants to learn modern DevOps tools and deployment strategies.
The practical exercises available through the Azure DevOps Lab Facility in Electronic City helped me understand pipelines, repositories, and automation workflows much better.
Great insights for students aiming to study in the top 10 university in world.
Thanks For Sharing the Articles, just Thanks Is not enough for all Keep Updating The Articles looking towards more. high demand courses in Canada for PR
Your article perfectly highlights the exact infrastructure skills that separate entry-level coders from advanced system architects. Senior professionals aiming to lead complex digital transformations definitely need a comprehensive curriculum like this GenAI Professional Course Electronic City program to master low-latency model operations.
I completely agree with your points regarding data privacy and secure enterprise integration patterns. Completing a rigorous GenAI Certification Training Electronic City curriculum is the most reliable way to demonstrate verifiable proof of capability to major global enterprise hiring teams.
Great content! The platform makes the entire journey smooth and easy. The personalized suggestions really improve the overall experience. universities in Germany.
Really engaging content. The platform helps users filter out unnecessary information easily.
It focuses only on what truly matters for better outcomesfree education countries for indian students.
Great explanation! This platform makes everything feel more manageable. The AI feature provides relevant and helpful suggestions. universities in Germany.
Great insights shared here. The platform makes planning feel more practical and achievable.
It supports users in making smart and informed choices free education countries for indian students.
I’m impressed with the clarity and structure of your content. It shows you really care about your audience and want to help them learn. high demand courses in Canada for PR
Thank you for this well-researched and informative article. I found the insights particularly useful and appreciated the practical examples included throughout the post. The information provided here can benefit many readers looking to improve their understanding of the topic. Great work and keep sharing. living expenses in UK for students per city.
I appreciate the depth of knowledge reflected in this article. The information is accurate, well-structured, and highly informative. Your explanations are easy to follow and provide real value to readers. Thank you for creating such helpful content and sharing it with your audience. Great job. universities without IELTS in Germany.
I really enjoyed reading this article from start to finish. The content is informative, engaging, and highly relevant. Your ability to explain complex ideas in a simple manner is impressive. Thank you for creating such high-quality content and making it available to readers seeking useful information. best courses to study abroad for jobs.
I really enjoyed reading this article from start to finish. The content is informative, engaging, and highly relevant. Your ability to explain complex ideas in a simple manner is impressive. Thank you for creating such high-quality content and making it available to readers seeking useful information. high demand courses in Canada for PR.
Post a Comment